Well, designing is not only about art there it surely includes some science in it. Also, there are several different types of sleepers but most commonly we used Railway sleepers and the?Hardwood railway sleepers.?Both these sleepers contain multiple uses if it is applied properly and also it will lift the garden to a professional level.?
Before moving further let?s have a look that what tools and materials you should need for designing the garden with the help of garden sleepers:
As there are numerous things that you can do in your garden by using these sleepers. So, here is a general list of both tools as well as materials that you might need. Moreover, you will also get Ideas for usingtimber railway sleepers?in the garden:
1: Hammer.
2: Concrete.
3: Safety googles.
4: Spirit level.
5: Work gloves.
6: Saws.
7: Concrete.
Here You Will Get to Know What Are the Best Steps to Lay Garden Sleepers. So, Keep Reading Below:?
1: Clearing the Area:
The first thing that you need to take care of before building the garden is you need to decide the location for planters or the raised beds. Once you have decided the place then you need to clean that area. By cleaning it will give a good look and good vibe to a garden.
2: Set the Foundation:
While setting the foundation you need to dig a trench of at least three to four courses in height. Now, fill it with a semi-conductor dry mixture and then lay the sleepers on the top. However, if you are looking to strengthen the structure then you should need to attach the screws or hooks to the sleepers and then lay them on the concrete.
3: Start Building Layers:
Do you know that more the corners your garden beds have, the stronger the structure will be? So, if you are looking to build the beds too high then you need to make sure that you add enough 90-degree angles to the structure.
As such there are numerous ways from which you can connect the garden sleepers along with the length. You can make use of long landscaping screws and steel rod pins as it provides enough strength to your garden.?

But sometimes you also need to take some precautions when you consider making a hole and hammering a dowel through the bed. You can do it once when you start reaching the top layer. In this way you don?t have to use steel screws on the top layer and also you don?t need to deal with rusting and dark marks as well.
4: End the Bed Planters:
You can sand the structure and give specific attention to the corners as they tend to be quite sharp. Thus, in this way you can finish the project by applying the beautiful stain or paint to the garden bed.
You need to remember that whenever it comes to connecting the corners then you can make use of angle brackets. However, if you don?t have such brackets then you can start considering cutting the ends of the sleepers in the L-shaped ends. Now, finally, you can overlap the sleepers and nail them in the place.
This method is quite time-consuming as well as challenging too. Thus, it is only practical if you are building the beds by using the sleepers flatter side. Moreover, you can also make use of corner posts in order to strengthen the structure.
5: Plan for Edging:
However, if you are simply looking to broaden up the garden then there is more than one way to do it. Also, if you are planning on making a sturdy border then you may need a concrete foundation. But if you want to make a vertical edging then the process is completely different. Thus, you need to decide that which type of garden edging you are looking for.
6: Look for Simple Garden Edging:
You can either make use of the flatter side of garden sleepers in order to build a simple garden edging. If you are looking to make the tall edgings, then layering the sleepers is the better idea.
It’s completely up to you that how you can make the foundation and stack and connect the sleepers. Also, it is almost the same in the case of retaining walls. Although, if you are making a short-edging then you don?t have to go overboard and fill the entire trench with the concrete mix.
For this, you can dig the small holes in a new place and then fill them with some concrete mix. Now, attach the screws to the Timber sleeper and then lay them in such a way that these screws are embedded in concrete.
7: Add More Layers:
In the case of raised garden beds, you need to keep on stacking and then connecting the sleepers until you get happy with the height. So, in order to make the structure more rigid, you just need to secure the wall i.e driven into the ground. Also, you should remember that it should be ideally embedded into a concrete hole.
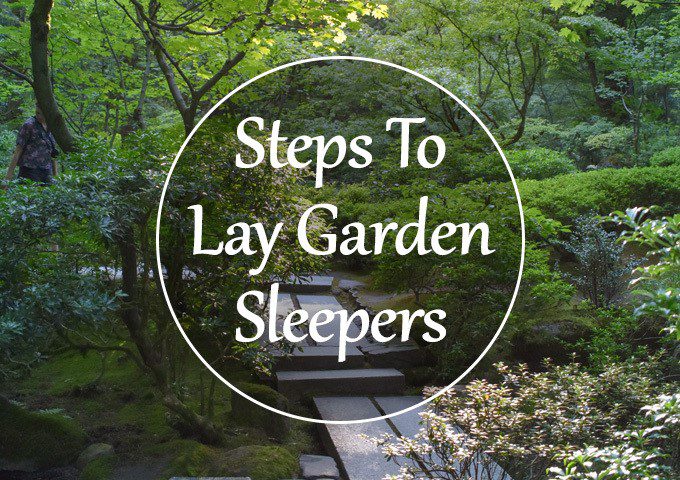
8: Make A Pathway:
You can make use of garden sleepers in case if you want to make a beautiful garden pathway. So, for this, you should need to concrete the sleepers in a place and also you need to dig a shallow rectangle hole on the ground and then place the sleepers.
Thus, you should remember that you need to surround the sleepers with gravel. Also, it is an ideal way to move forward. It might take some time for the sleepers to get into the soil so you should have some patience in you.
Conclusion:
In the end, the garden sleepers give a good vibe to your garden. You can also make garden beds, make garden planters, and give the edge to your garden. The garden sleepers are widely used for various purposes when it comes to garden renovation.
So, in this article, we have described 8 different ways in which you can make use of garden sleepers for garden landscaping. You need to consider the above steps if you are looking How to use sleepers in Garden and how to make your garden beautiful it catches the attention of other people towards your home.